
You know removing the image background has an affluence of benefits including trouble-free across sales channels, improved page loading speed and increased the attention of customer on your product. But the biggest problem is that you might not know how to remove the background of an image in different tools yourself.
Most people handle their store’s design tasks yourself, and they may be having a knowledge of various tools to remove image background than they realize. Most people know there’s Photoshop, but it is not the only option. Today, more alternative options are available in the market those are simpler, lower cost and other options you can also find them.
There are four editing tools described that are the best for eCommerce online shopping store. In an online store, background product removing is best and also increased your customers and profits. Let’s walk with me and take a look at the best options for removing the background of product photos for your online store.
1- Preview for Mac OS X
Mac OS X is an application that you can use on the Mac. If you are Mac user, then it is best for you and helps you to remove a background from your products. You probably use presurvey all the time, but you might not understand that it can edit images and also take away backgrounds too.
Under this tool, you can see the tools for removing the image’s background in under the “Select” drop-down list of options by clicking the icon in the top left of the chalk up the toolbar.
First, select the “Smart Lasso” tool that you can find the editing button like a highlighter in a square box that allows you to draw around your product or requirement with a relatively blunt outline. Due to this program, that outline determines the place where the border is between the background and the product.
Now, you can go to “edit” and then “Invert Selection” and this will select the background to expect your object. After that, click of the delete button and you get your product with the transparent background.
Other than that, the sample also offers the “Instant Alpha” tool that you can select from the markup toolbar, just click and drag on the image’s background. After clicking, you’ll see selected areas of the image changing color to designate your selection. When you choose your product or desired area, just use your delete key to remove a background.
The tool of “Instant Alpha” selects areas that are similar in color and contrast, so due to that, this tool may not be the best tool for those products which have a complicated background image. But if we talk about the speed then it is the very useful tool and fast way to pick and switch the background of your product or image.
2- Paint.Net
Paint.Net is a best for windows user because most Windows user was depressing, they don’t have access to Preview. But, now don’t sweat it. It is the reality that you get in the face of Pain.Net that is an app which is available online as a free download. It also offers you many helpful tools, including the ability to quickly remove image background.
After adding the product image in the program goes to app toolbar and select the “Magic Wand” tool. If your product background is white or another solid color, then this makes background deletion much easier. By using “Magic Wand” tool click somewhere on product background.
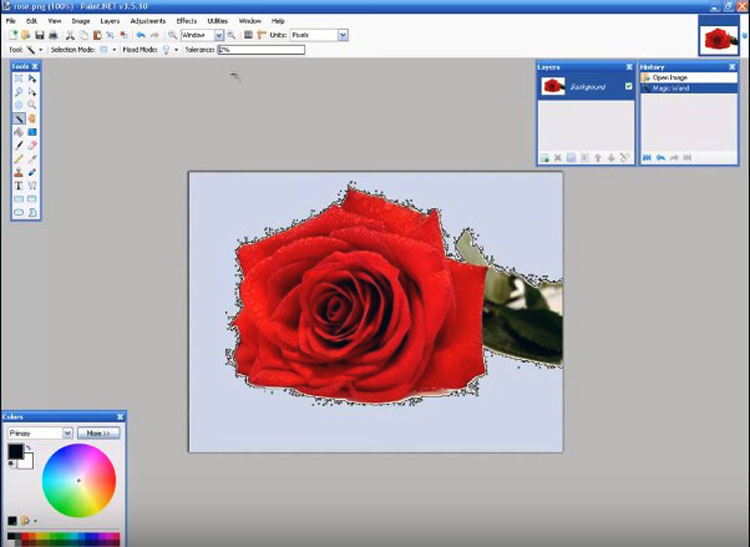
When you select the background with the Magic Wand tool, it will also select part of your product. If you see this situation, you can go to the top of the program and adjust your lenience until only the background is selected.

If you see your product background color is not consistent as you want, you will likely need to choose the background and delete it multiple times.
When you’ve removed most of the background, zoom in around the edges and make sure to remove the remaining background around your product. For this, you can use the “Eraser” tool or also “Wand Magic” tool. When you clean up your image and ready to save it, at this time, you want to make sure you save it in PNG file because jpg will lose your transparency.

3- GIMP
GIMP is software that is available for free both OS X and Windows user. It is open access image editing software that you can get easily. It is more powerful image editing tool that we’ve prior looked. More interest thing of this software is that it is alternative of Photoshop.
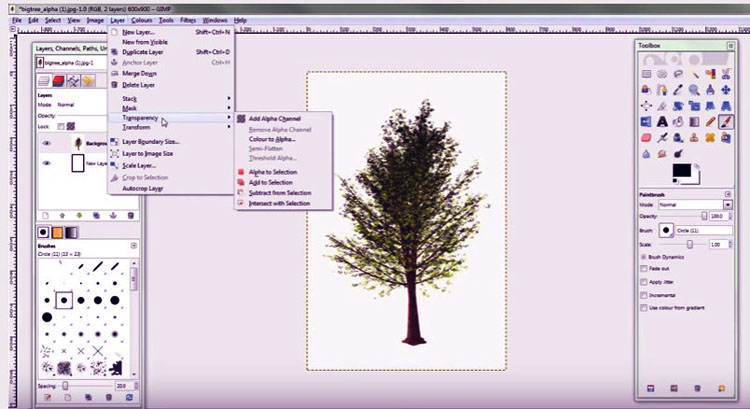
First, add the image to the software that you want to edit. When you add the product to the software, you need to go to add an Alpha Channel to the picture so you can achieve a transparent background. For this process, you go to “Layer à Transparency à Add Alpha Channel”. This will tell the program to generate a transparent background when you delete existing one.
After this, you can select the background of the picture for removing. For this go to the Toolbox and select the “Fuzzy Select tool”. Then starts the selecting and removing the background of the product. Adjusting the threshold area as needed to keep from deleting part of your item for consumption.

If you find any area that you not need, you go to the toolbar and select the Eraser tool and clean up all spots that the “Fuzzy Select Tool” missed. Save it in PNG file for transparent background.
4- Photoshop
Adobe Photoshop is very famous image editing software for graphic designers worldwide. The above options on this list of image background removing software are free and also have fewer features. However, Photoshop is not free it requires monthly $10 payment from Adobe as part of the Creative Cloud set. Photoshop offers you all the power that a professional image editor needs.
It gives the two different selection tools:
- Magic Wand: it helps us to highlight the outline of the product and also best for the large general areas. But in some situation, it will not perfectly outline some of the finer details.
- Pen Tool: it is the second tool that we can use for background removing. It is best for curves, so we can use this tool where Magic Wand is not working properly.
First, we duplicate the background layer. Because it will allow us to get rid of the just background of the product at the end.

Select the product and separate it from the background. Click the magic wand tool in the menu bar and choose the general shape of the shoe. When you use it might be some background area is also selected.
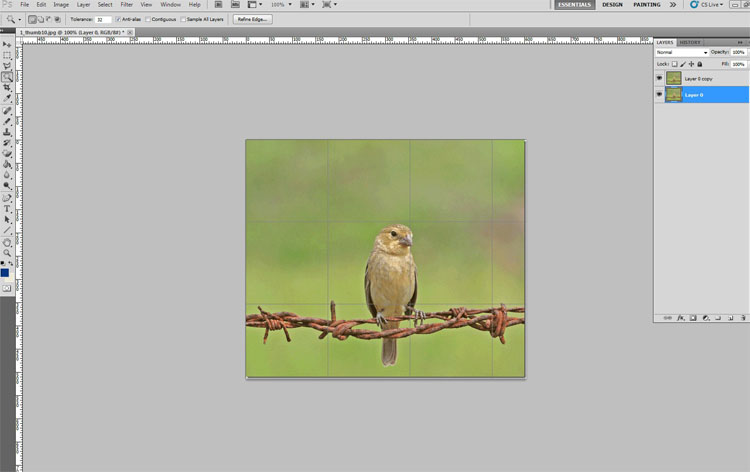
In this situation, we use the Pen Tool and make a perfect outline around the field of the product. That you would like to select and terminate with a circle the chosen background area.

When you have done your selection around the selected area, right-click and go to “Make Selection” after that “Subtract from selection” to make a perfect outline around the product and we can eliminate the background.

After the best selection, we delete both the background in the image and layer too. When we eliminate the layer of background, we obtain the perfect image with transparent background.